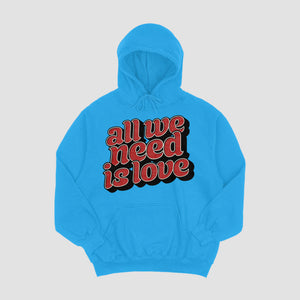
In the fast-paced world of garment customization, efficiency is key to maintaining competitiveness and meeting customer expectations. Direct-to-Film (DTF) transfers have emerged as a revolutionary technique that enhances productivity without compromising on quality. This guide delves into the intricacies of DTF transfers, providing valuable insights into maximizing efficiency in your printing operations.
Understanding DTF Transfers
DTF transfers involve printing designs directly onto a special film, which is then transferred onto garments using a heat press. This method offers several advantages over traditional techniques, such as screen printing and Direct-to-Garment (DTG) printing.
Key Advantages of DTF Transfers
- Versatility: DTF transfers can be used on a wide range of fabrics, including cotton, polyester, and blends, making them suitable for diverse applications.
- Vivid Colors: The process ensures vibrant and long-lasting prints, even on dark fabrics.
- Cost-Efficiency: Minimal setup costs and the ability to print small batches reduce overheads significantly.
- Durability: The prints are highly durable, withstanding multiple washes without fading.
For a more comprehensive understanding of this technique, discover expert strategies here.
Steps to Implementing DTF Transfers
1. Preparation
Proper preparation is crucial to achieving high-quality DTF prints. Follow these steps to ensure optimal results:
- Select the Right Film: Choose a film that is compatible with your printer and suitable for the fabric type you are using.
- Design Considerations: Ensure that your design file is of high resolution and color-corrected to achieve the best print quality.
- Printer Calibration: Regular calibration of your printer ensures color accuracy and consistency across prints.
2. Printing
Once preparation is complete, the printing phase involves the following steps:
- Loading the Film: Load the film into the printer, ensuring it is positioned correctly to avoid misalignment.
- Printing Process: Use the appropriate printer settings for DTF printing, including the correct ink density and drying time.
- Powder Application: After printing, apply a special adhesive powder to the wet ink to ensure proper adhesion to the fabric.
3. Transferring
The transfer stage involves applying the printed film onto the garment using a heat press. Here are some critical steps:
- Heat Press Settings: Adjust the temperature, pressure, and time settings according to the film manufacturer’s recommendations.
- Peeling: Once the transfer is complete, peel the film carefully while it is hot or cold, depending on the specific film used.
- Quality Check: Inspect the final product for any defects or inconsistencies and make necessary adjustments.
For more in-depth guidance on the transfer process, explore advanced guides and tips.
Maximizing Efficiency in DTF Transfers
To fully leverage the benefits of DTF transfers, consider the following efficiency-enhancing strategies:
Automation and Technology
- Invest in Automation: Automated systems can streamline the printing and transfer processes, reducing manual intervention and minimizing errors.
- Embrace Technology: Utilize software solutions for design, color management, and workflow optimization to boost productivity.
Continuous Learning and Adaptation
- Stay Updated: Keep abreast of the latest trends and technological advancements in DTF printing by attending industry seminars and workshops.
- Feedback and Improvement: Regularly seek customer feedback and implement improvements to enhance service quality and customer satisfaction.
To delve deeper into efficiency strategies, find out more about this approach.
Conclusion
DTF transfers offer a versatile and efficient solution for garment customization. By understanding the process and implementing best practices, businesses can significantly enhance their printing operations. For additional resources and expert advice on optimizing DTF transfers, learn about our tailored solutions.